- Preparing XAMPP-VM for multiple projects.
- Close XAMPP completely
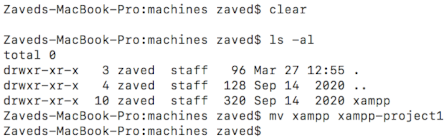
- Rename xampp directory: Check "/Users/{username}/.bitnami/stackman/machines", there lies the 'xampp' directory whcih contains the active project files/xampp environments. If this is renamed to something else and xampp is restarted, a new xampp directory will be automatically created. Renaming is harmless [as checked on March, 2021] - rename it back to xampp, [of course need to take care in case any other directory of the same name exists] will make it the active project and without any alteration. For example if gulp/nodejs/composer/wordpress or any other package/framework previously installed will work same as before.
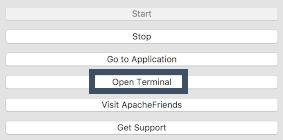
- Once XAMPP restarted, open terminal from XAMPP and install vim which will come handy time to time:
root@debian:~# sudo apt-get install vim
- Install Wordpress and prepare permissions
- Wordpressbitnami stack will be installed in this tutorial, which can be found here. Save the link for The Linux 64-bit version. Open the XAMPP terminal. Issue the following commands:root@debian:~# cdroot@debian:~#root@debian:~# wget https://bitnami.com/redirect/to/876131/bitnami-wordpress-5.3.2-2-module-linux-x64-installer.runroot@debian:~# chmod +x bitnami-wordpress-5.3.2-2-module-linux-x64-installer.runroot@debian:~# ./bitnami-wordpress-5.3.2-2-module-linux-x64-installer.runthe wget link is an older version of bitnami-wordpress package. Once installed, update to the latest version of wordpress by logging into wordpress/admin.This will download the installer in root's home directory, change the permission so that it's an executable and then start the installation.
- Install git [optional]. XAMPP-VM does not come with git pre-installed. A couple of commands will do.
root@debian:~# sudo apt-get updateroot@debian:~# sudo apt-get install git
-
Login to WordpressAdmin page in local environment.
localhost:8080/wordpress/wp-admin/Use the username/password created in Step 2.1. UpdateWordpressto the latest version. Remove/update the default plugins and themes as suited. -
Go back to the XAMPP terminal. Wordpressis installed here:/opt/lampp/apps/wordpressSince all the commands run from the XAMPP terminal so far are as root, we need to change the permission of some folders for the apps to be developed so that the editors [Atom/Visual Studio etc] can edit/create files and folders. Issue the following commands:root@debian:~# cd /opt/lampp/apps/wordpress/htdocs/wp-content/themesroot@debian:~#/opt/lampp/apps/wordpress/htdocs/wp-content/themes# mkdir mythemeroot@debian:~#/opt/lampp/apps/wordpress/htdocs/wp-content/themes# chown bitnami:root mythemeNow, new theme can be developed from editors outside the XAMPP-VM.
- Installing Nodejs and Node Package Manager (npm)
- Nodejs and npm has become one of the essentials for web development. Nodejs facilitates managing
different packages and dependencies. In this tutorial, we will use npm for installing 'gulp'.
Issue the following commands in XAMPP-VM terminal:
root@debian:~# sudo apt-get updateroot@debian:~# sudo apt-get install nodejsroot@debian:~# sudo apt-get install npm
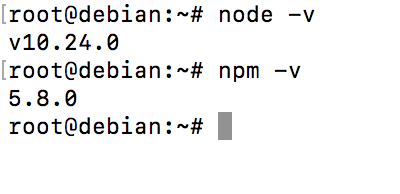
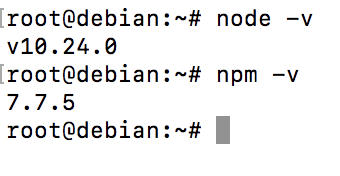
- After the commands finish execution, issue the commands as shown in figure. If versions are shown
in the output, installation has been completed. Check if you see the following warning:
npm does not support Node.js v10.24.0In such case, close the XAMPP-VM terminal and open again. Then issue the following command:root@debian:~#npm i -g npm@next
- Nodejs and npm has become one of the essentials for web development. Nodejs facilitates managing
different packages and dependencies. In this tutorial, we will use npm for installing 'gulp'.
Issue the following commands in XAMPP-VM terminal:
- Installing Gulp and package.json
- Change to the project directory Issue the following commands in XAMPP-VM terminal:
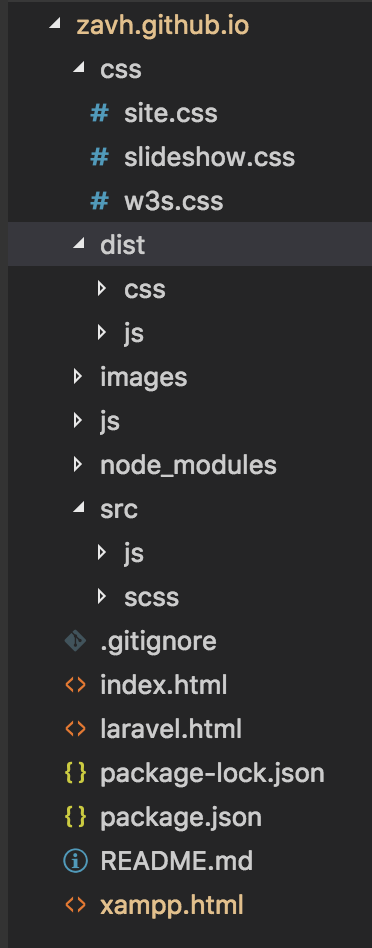
root@debian:/opt/lampp/htdocs/zavh.github.io# npm initAfter inserting the appropriate options, this will create the package.json file in the project directory. Then to install gulp, issue the following command:root@debian:/opt/lampp/htdocs/zavh.github.io# npm install --save-dev gulpGulp is used for compiling scss and es6 to regular css and vanilla javascript files and also to create the minified versions of them. A proper directory structure is preferred for that. Here, an 'src' [source] directory will hold the scss and es6 files and a 'dist' [distribution] directory will hold the compiled and minified versions. Create a js and scss directory in src and js and css directory in dist folder. The directory structure looks like the right hand side image.
- Step 4.1 will create a huge node_modules directory which is used for development purposes. No need to put it in
production environment or git repository. Anybody developing from the repository can 'npm init' to create the files automatically.
So, better put the directory in .gitignore.
root@debian:/opt/lampp/htdocs/zavh.github.io# touch .gitignoreroot@debian:/opt/lampp/htdocs/zavh.github.io# vi .gitignoreWrite 'node_modules' in the .gitignore file to prevent it from tracking.
- Next is Gulp CLI. To install, issue the following:
root@debian:# npm install --global gulp-cliGulp CLI is installed globally, issue the terminal command from any directory.
- Two more essential packages needed for SASS processing. Issue the following commands from project directory:
root@debian:/opt/lampp/htdocs/zavh.github.io# npm install --save-dev gulp-sassroot@debian:/opt/lampp/htdocs/zavh.github.io# npm install --save-dev gulp-rename
- An example: Using the directory structure, all source codes [scss for css] will be put in the 'src directory'. Then Gulp cli will
be used to generate css files, minified and transferred to the dist/css directory. Make sure that the 'link' tags' src are pointing
to the dist/css/[css filename].min.js. Following code is saved as gulpfile.js in the project directory.
var gulp = require( 'gulp' );
var rename = require( 'gulp-rename' );
var sass = require( 'gulp-sass' );

var styleSRC = './src/scss/site.scss';
var styleDIST = './dist/css/';

gulp.task('style', async function(){
    gulp.src( styleSRC )
        .pipe( sass( {
            errorLogToConsole: true,
            outputStyle : 'compressed',
        } ) )
        .on( 'error', console.error.bind( console ) )
        .pipe( rename( { suffix: '.min' } ) )
        .pipe( gulp.dest( styleDIST ) );
});
This is telling gulp to do the followings
-- Read the file specified by 'styleSRC'.
-- Compress or minify it.
-- Add a suffix .min.
-- Finally transfer it to the destination directory specified in 'styleDIST'To run, execute the following:
'style' is the name of the gulp taskroot@debian:/opt/lampp/htdocs/zavh.github.io# gulp styleExpected output:
root@debian:/opt/lampp/htdocs/zavh.github.io# gulp style
[14:10:22] Using gulpfile /opt/lampp/htdocs/zavh.github.io/gulpfile.js
[14:10:22] Starting 'style'...
[14:10:22] Finished 'style' after 36 ms
Expected result: A minified version of site.scss residing at the styleDest directory as site.min.css
- Change to the project directory Issue the following commands in XAMPP-VM terminal: